Import vehicles
Add many vehicles at once from an Excel file. To add one vehicle, see Vehicles.
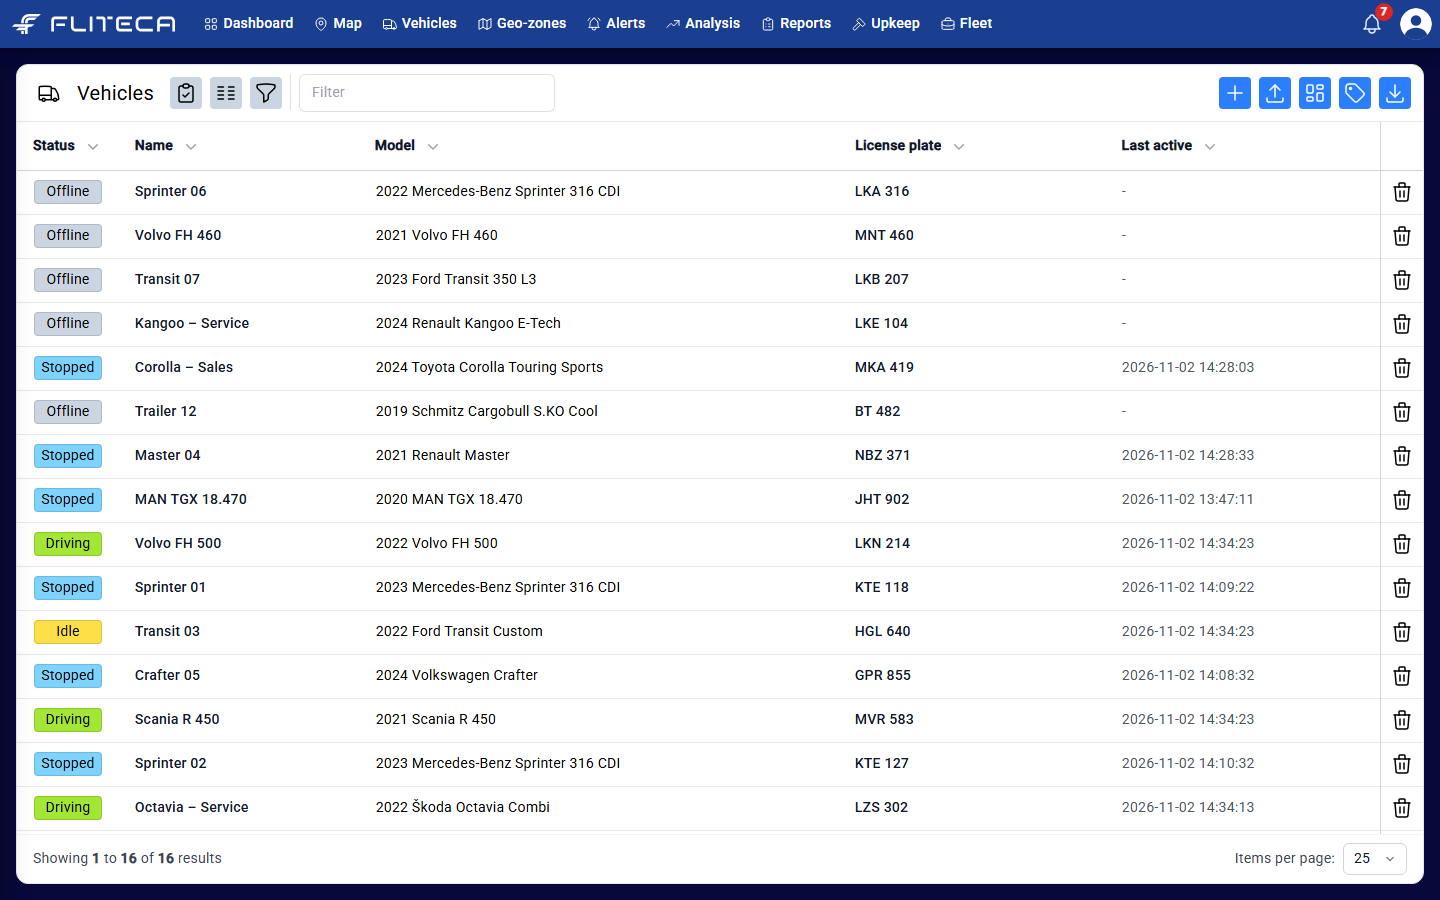
Click Vehicles in the top menu.
Click Import above the vehicle list (the arrow pointing up).
Click Download template. You get an Excel file with the right columns.
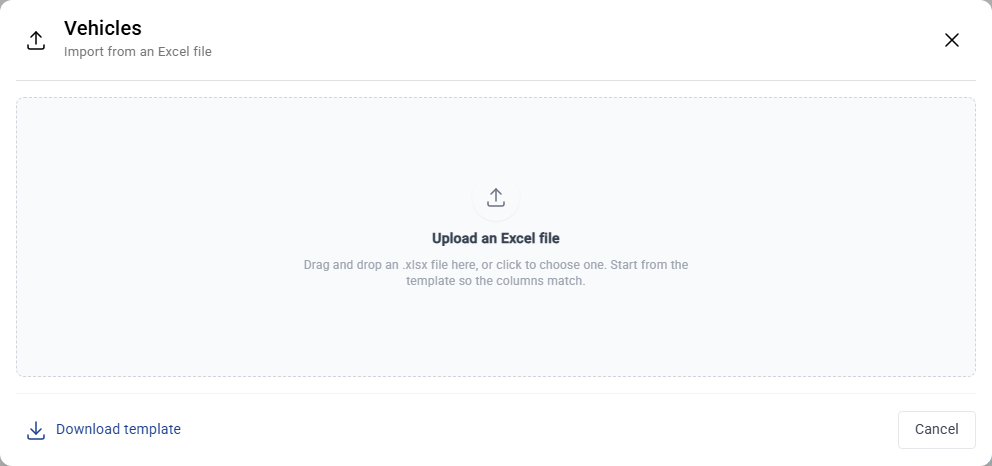
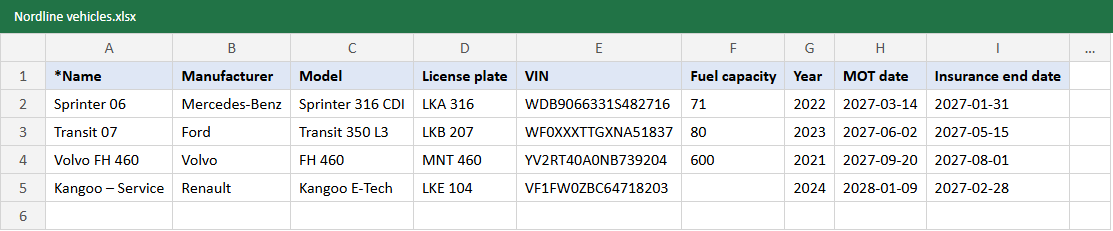
Open the file and fill in one vehicle per row. Only Name is required.
Write dates as year-month-day, for example
2027-03-14.Fuel type is Petrol, Diesel or EV. Transmission type is Automatic, Manual or SemiAutomatic.
Category is Car, Truck, Trailer, Motorcycle, Tractor, Bus, Boat or Other.
Group must be written exactly like the group in Fliteca.
IMEI links the vehicle to a tracker that you already added.
Save the file. Drop it into the import window, or click the window to choose it.
Fliteca checks every row and shows a preview. Green rows are ready. Red rows have a problem.
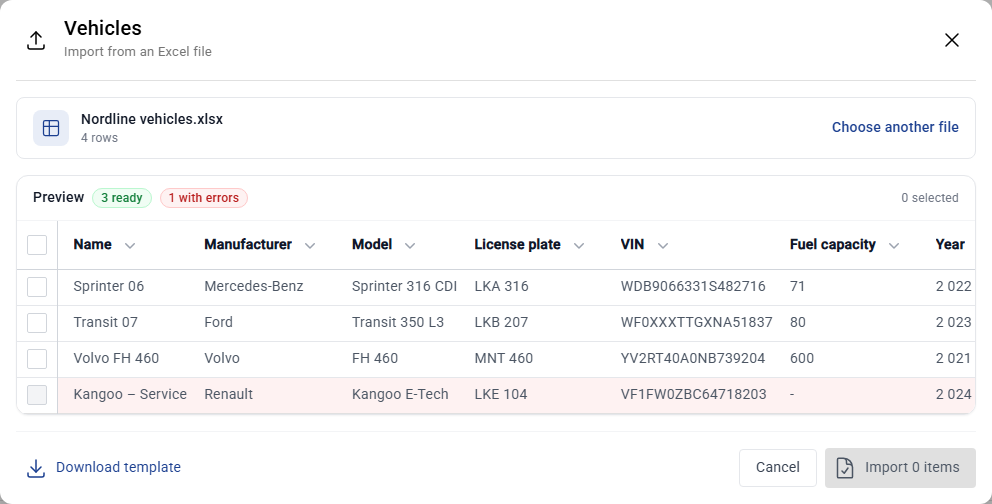
Scroll the preview to the right to find the red value. Point at the i to read what is wrong. In this example, the group “Service and sales” does not exist.
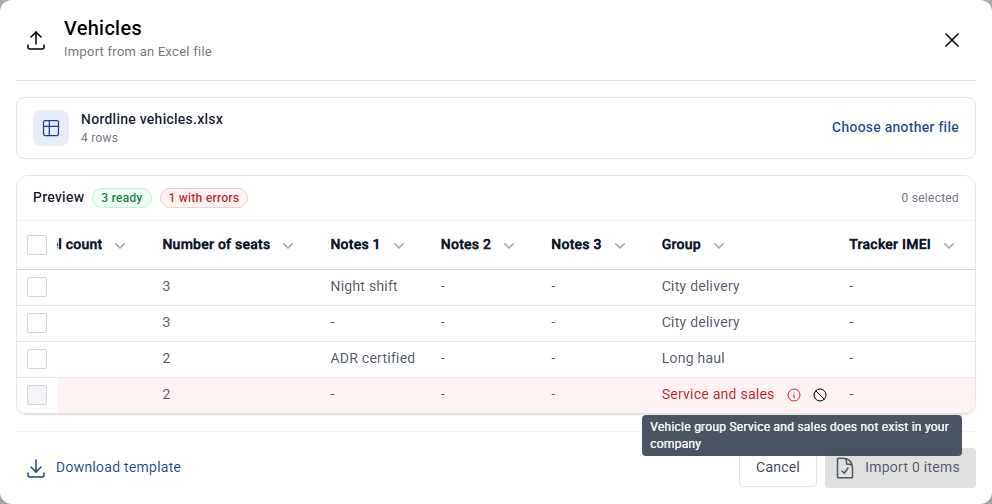
You have two choices:
Fix the value in Excel, save the file and click Choose another file.
Click the crossed circle next to the value to skip it. The rest of the row is imported.
Tick the rows to import. Tick the box in the header to select all rows.
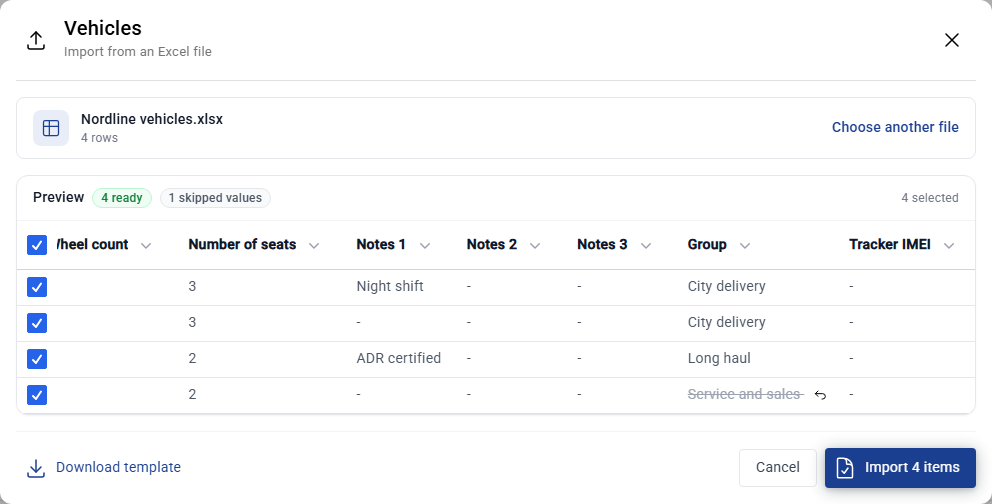
Click Import 4 items and then Yes.
The new vehicles are at the top of the list. Link a tracker to each of them, or add the IMEI in the file next time.