Tip
This feature might be limited based on your subscription level. Please check your subscription for more details.
Alerts
With alerts you can get notified, when a vehicle enters or leaves a geo-zone. For example: “Tell the dispatchers when a city van arrives at a customer warehouse.”
An alert can show a notification in the system, on your mobile app, send an email, or send the data to another system via a webhook.
Click Alerts in the top menu to see your alerts.
Your alert list
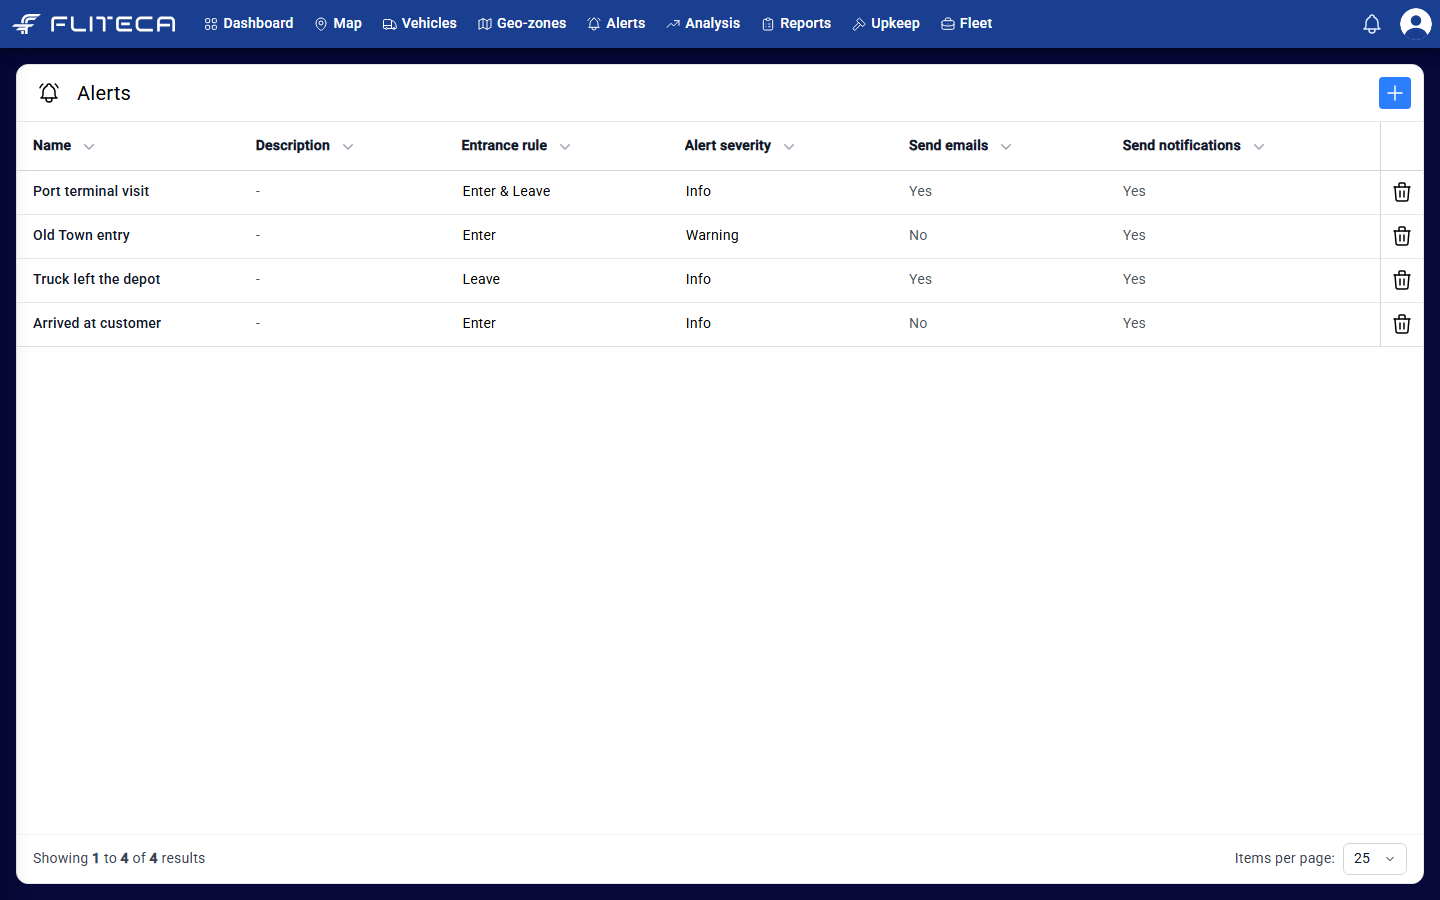
The list shows each alert’s name, whether it fires on entering or leaving, its severity, and whether it sends emails and notifications. Click an alert to change it. Click the bin to delete it.
Create an alert
Click + above the alert list. You fill in the page from left to right.
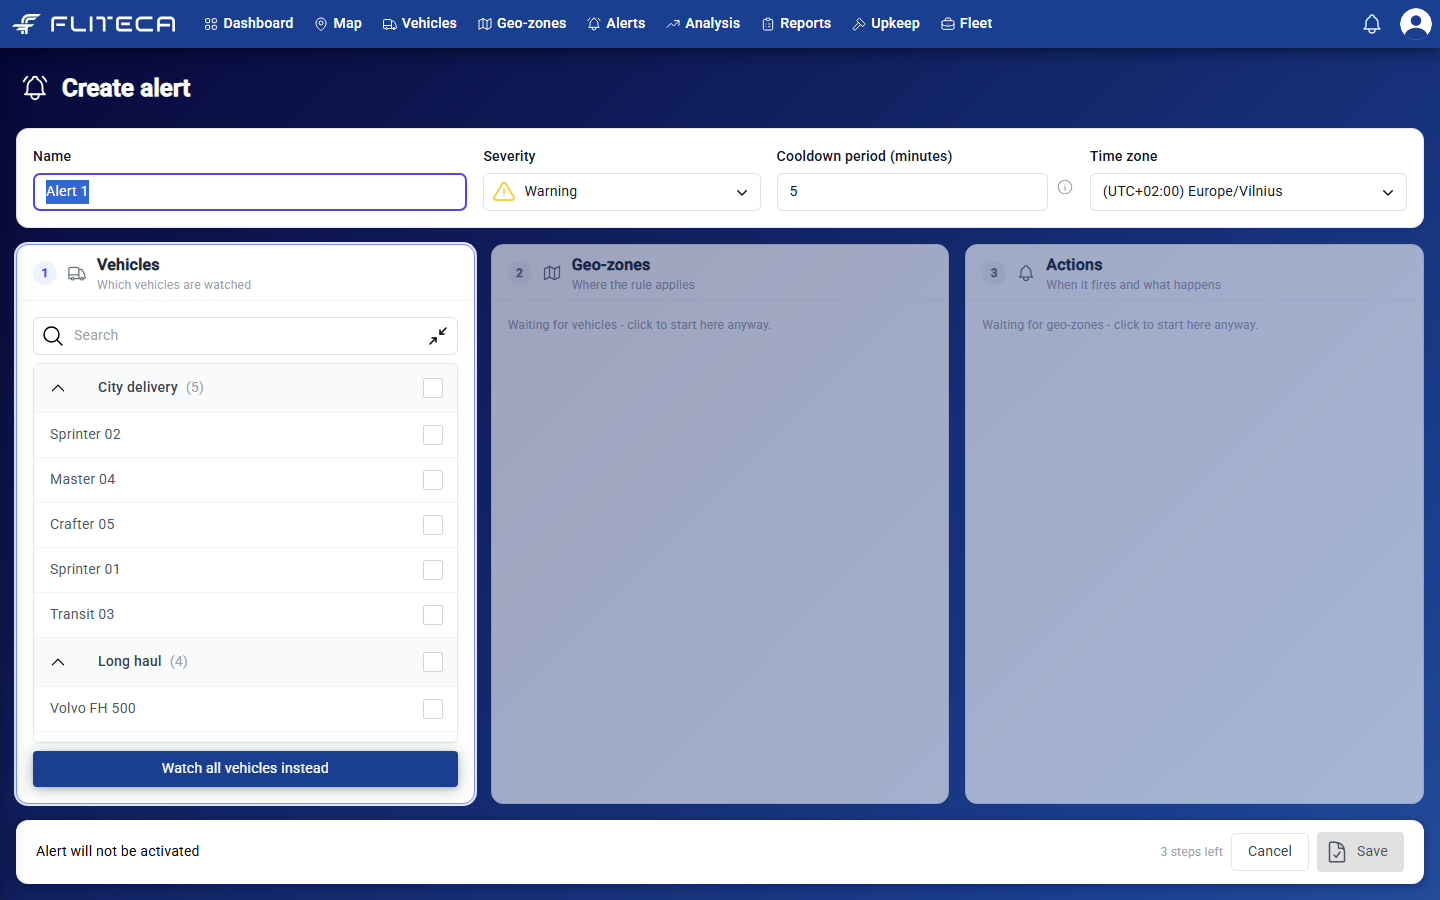
1. Name and settings
Name – for example “Arrived at customer”.
Severity – Info, Success, Warning or Critical. It sets the icon and color of the notification.
Cooldown period (minutes) – stops repeated alerts while a vehicle drives along the edge of a zone. Enter 0 to get an alert every time.
Time zone – the time zone of the times in the messages.
2. Vehicles – which vehicles to watch
Tick vehicles or whole groups. Click Watch all vehicles instead to watch every vehicle, including vehicles that you add later.
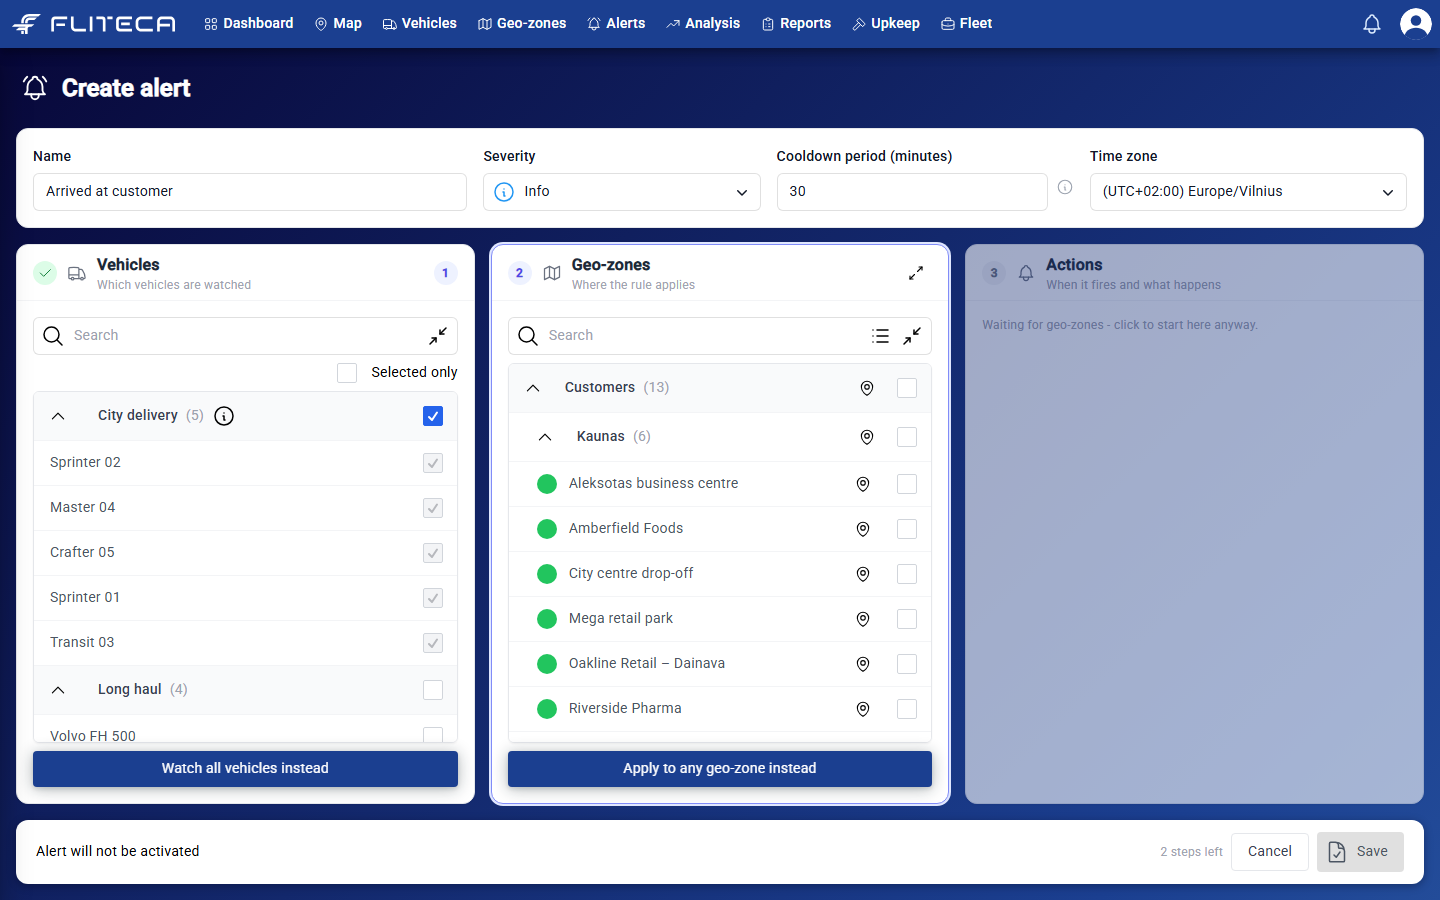
3. Geo-zones – where the alert applies
Tick geo-zones or whole groups. Click Apply to any geo-zone instead to use every geo-zone, including geo-zones that you draw later.
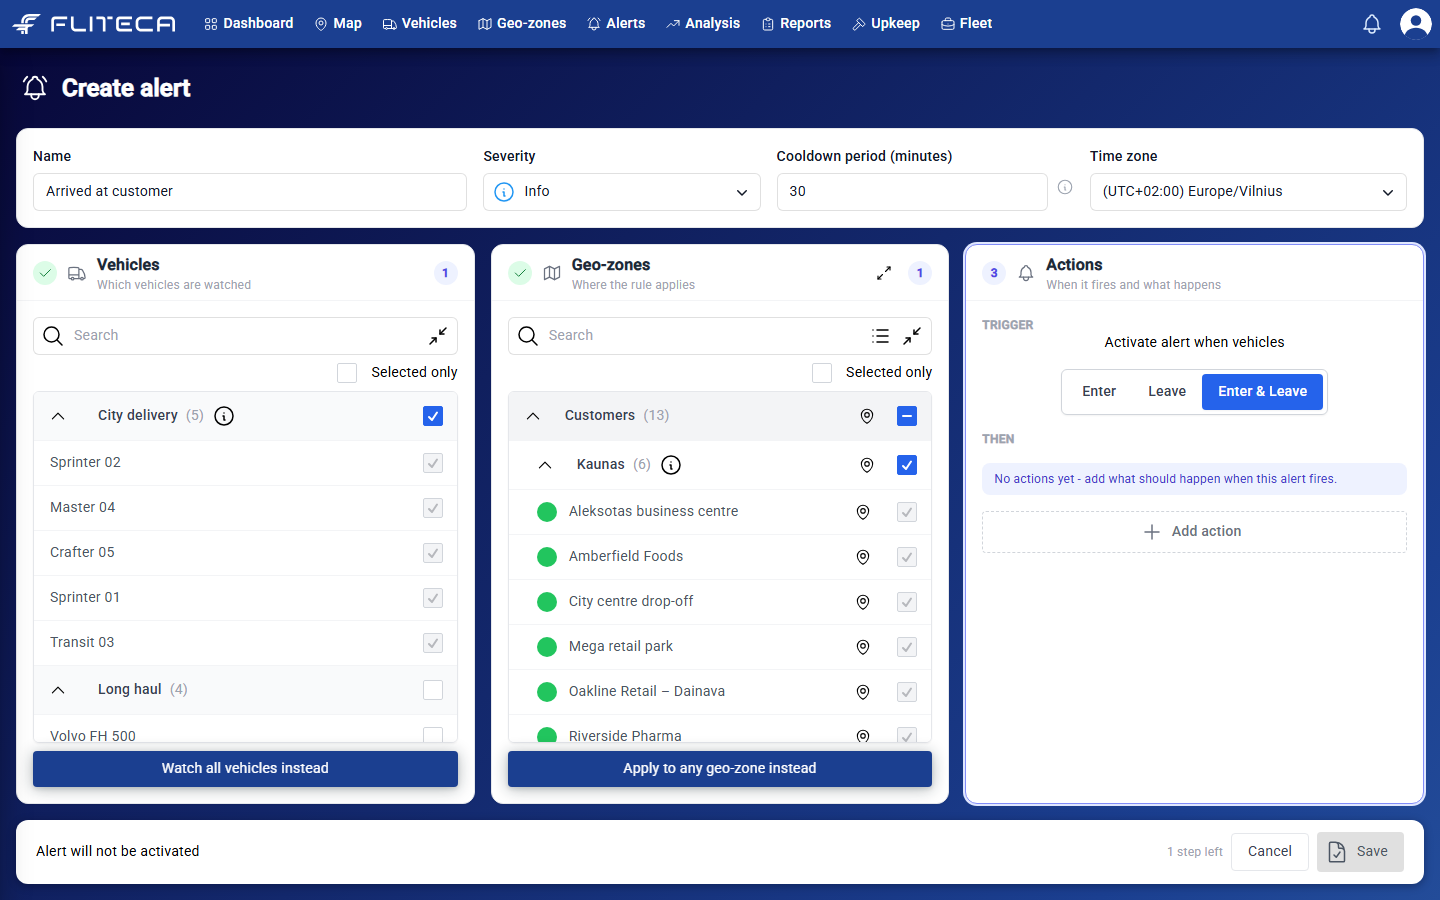
4. Actions – when the alert fires and what happens
Under Trigger, choose when the alert fires: when vehicles Enter, Leave, or Enter & Leave.
Click Add action and choose what happens:
In-app notification – a notification under the bell for the employees you choose
Email – an email to the employees you choose
Webhook – sends the alert data to another system (see below)
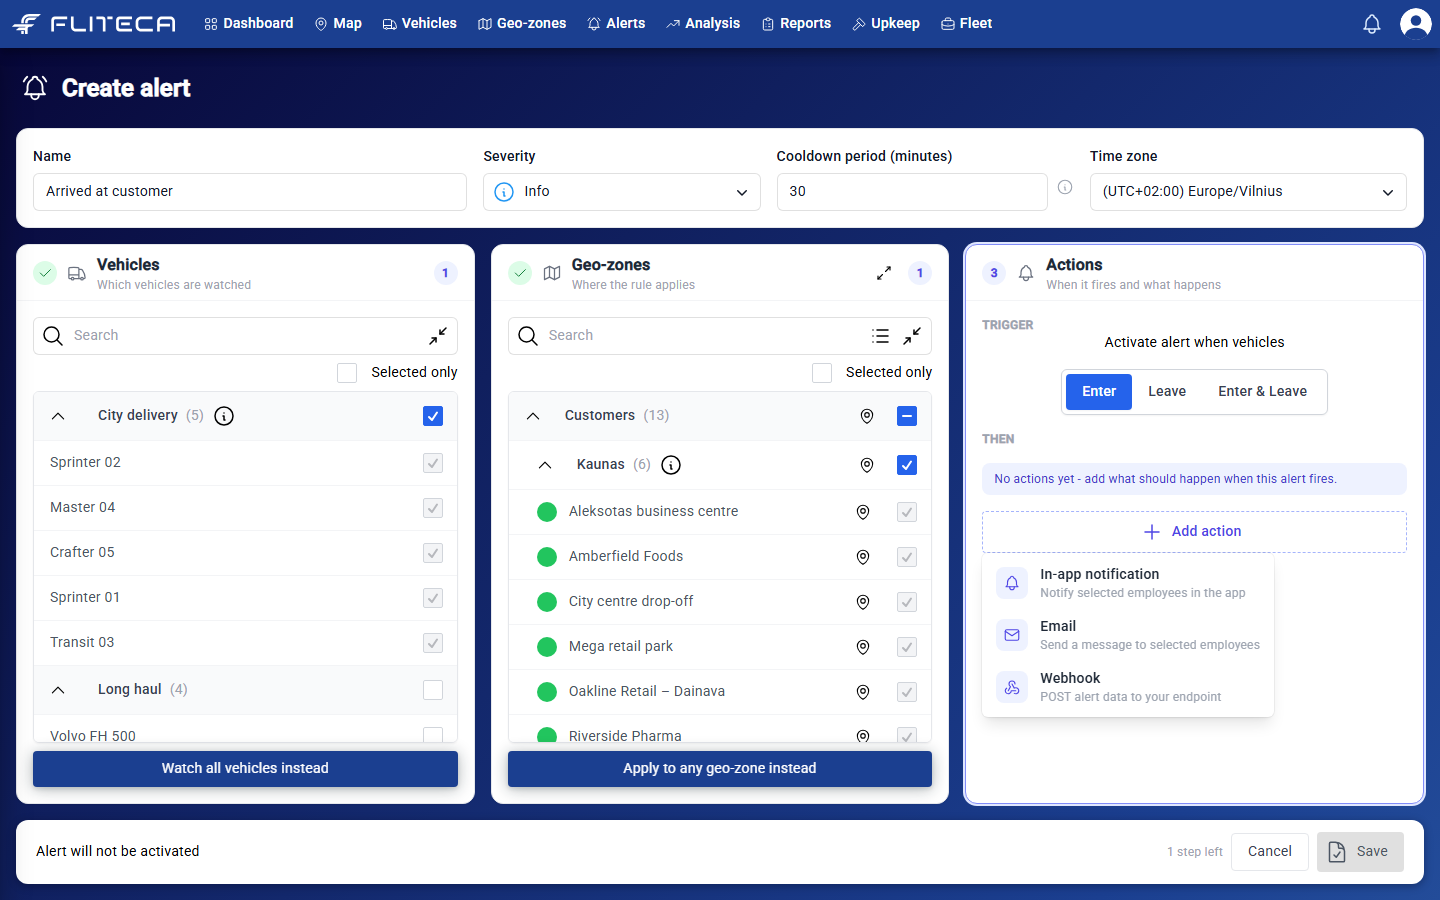
Write the message and tick who gets it. Click the { } button in the message to insert details such as the vehicle name.
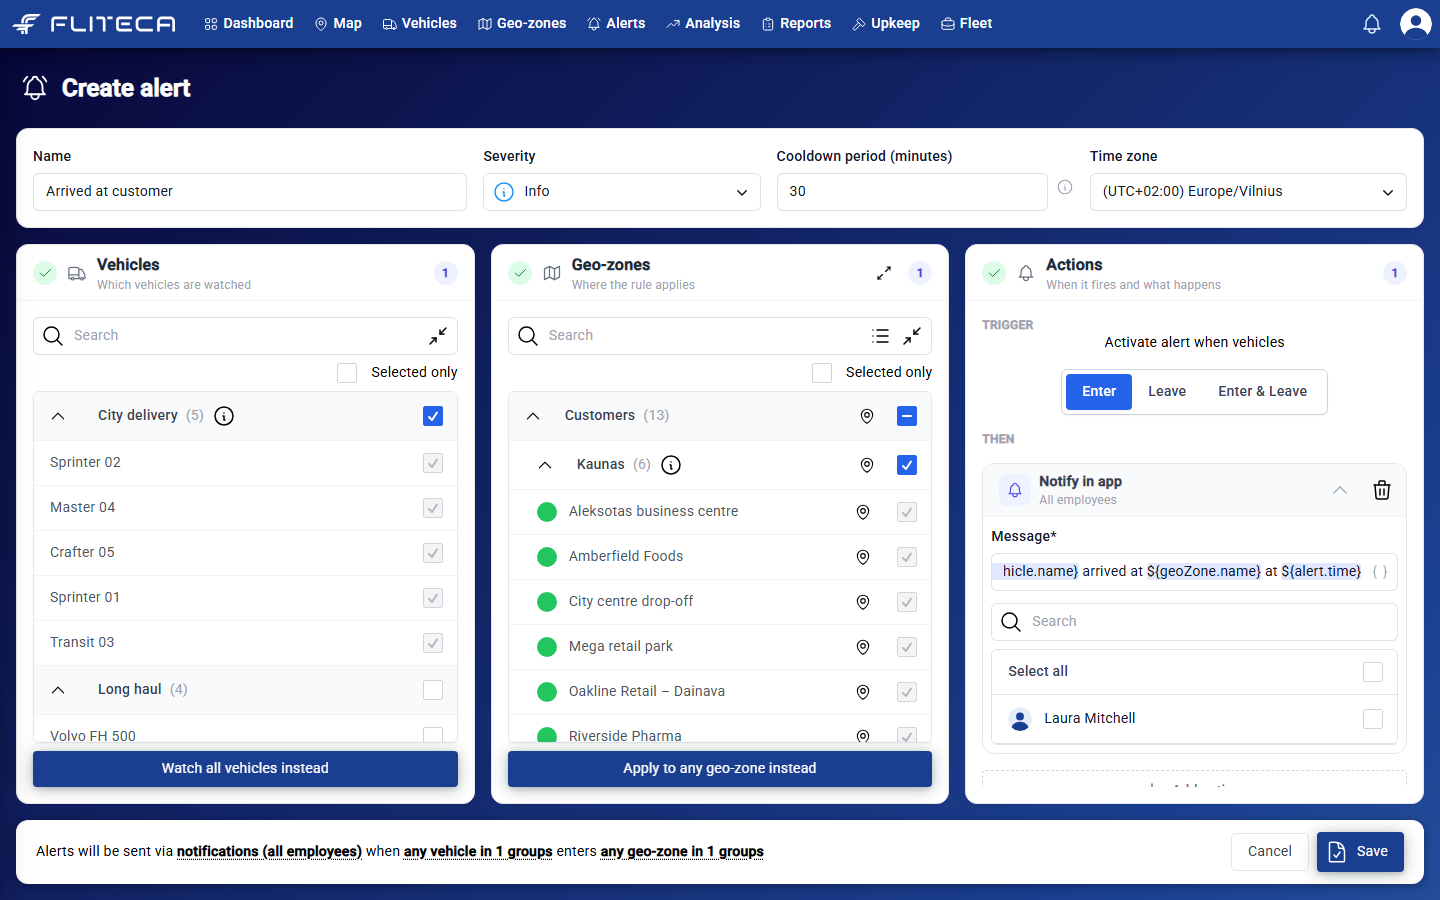
5. Check and save
The bar at the bottom says in plain words what the alert does, for example: “Alerts will be sent via notifications (all employees) when any vehicle in 1 groups enters any geo-zone in 1 groups”. If it is right, click Save.
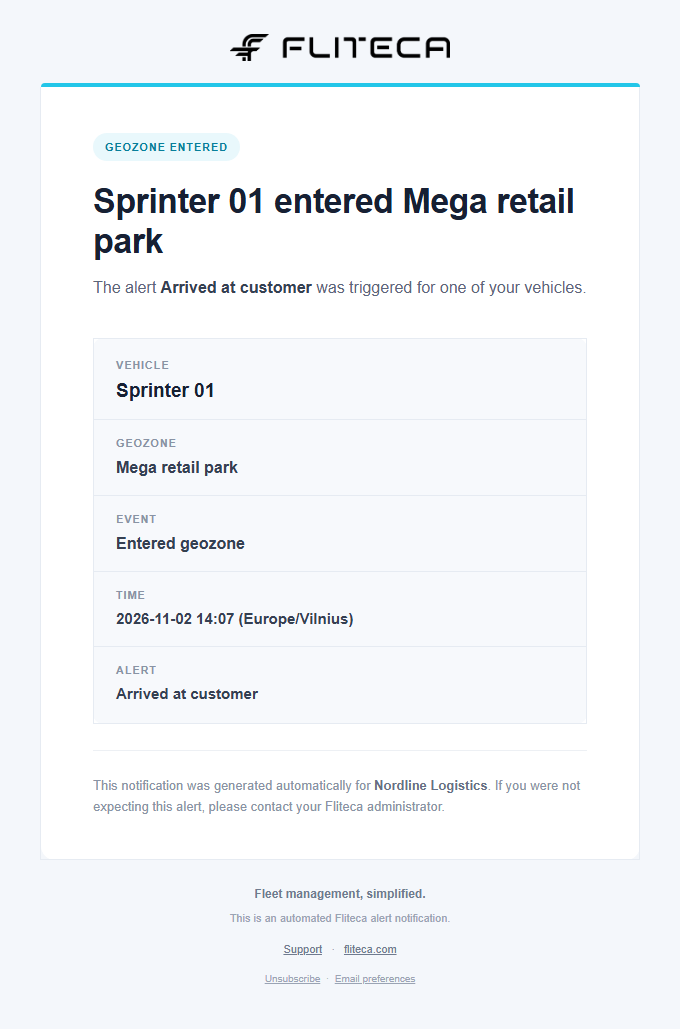
When the alert fires, the employees in its Email action get an email like this:
Details you can put in a message
Placeholder |
What it becomes |
|---|---|
|
The vehicle’s name |
|
The vehicle’s group |
|
The vehicle’s notes |
|
The tracker’s IMEI |
|
The geo-zone’s name |
|
The geo-zone’s group |
|
The alert’s name |
|
Whether the vehicle entered or left |
|
When it happened |
|
The alert’s time zone |
Send alerts to another system (webhook)
A webhook sends the alert to your own software, for example a dispatch system, as soon as it fires.
Note
Webhooks are available on higher plans.
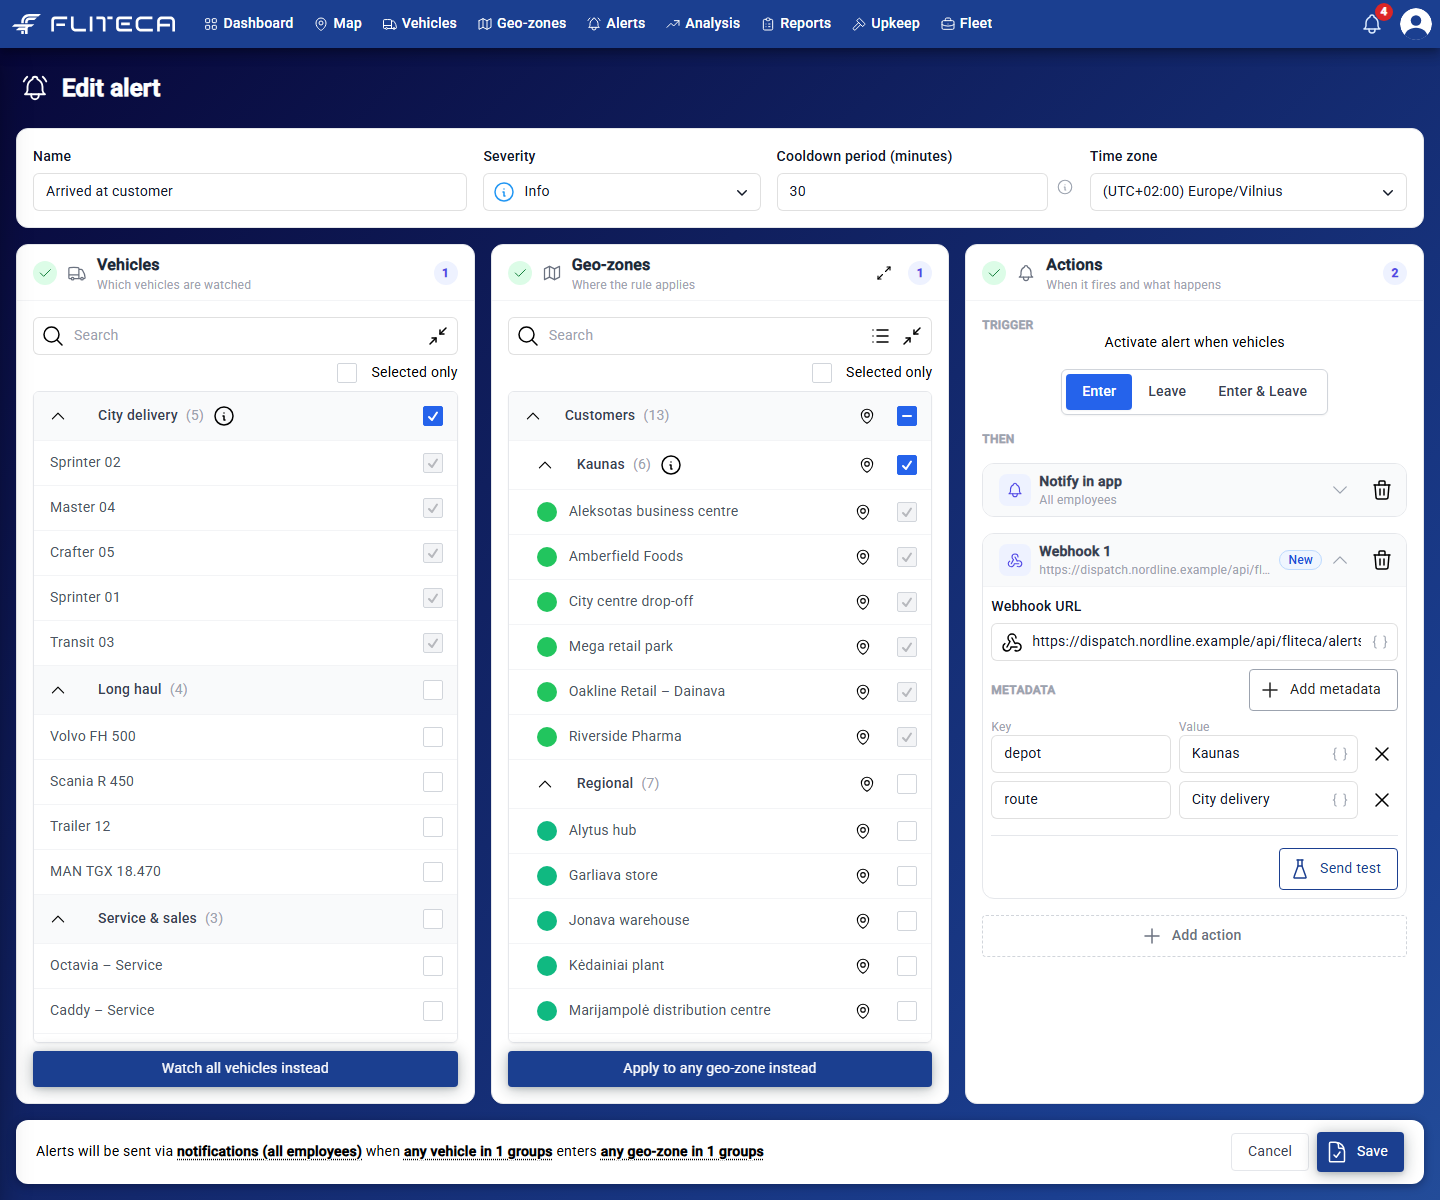
In Actions, click Add action and choose Webhook.
In Webhook URL, enter the address that your IT team gives you.
Optional: click Add metadata to send extra values with every alert, for example the depot or route.
Click Send test to send an example and check that your system receives it.
Click Save.
Fliteca sends a POST request with this JSON body:
{
  "idempotencyKey": "3f6b2a0e-7c1d-4a8e-9b2f-1c5d7e9a0b34",
  "alertId": "a1d4c2b0-5e6f-4a7b-8c9d-0e1f2a3b4c5d",
  "alertName": "Arrived at customer",
  "alertSeverity": "info",
  "vehicleId": "7e2c9b1a-3d4f-4e5a-8b6c-9d0e1f2a3b4c",
  "vehicleName": "Sprinter 01",
  "geoZoneId": "c0b1a2d3-e4f5-4a6b-8c7d-9e0f1a2b3c4d",
  "geoZoneName": "Amberfield Foods",
  "isEntrance": true,
  "timeStamp": "2026-11-01T09:42:17Z",
  "longitude": 23.979735,
  "latitude": 54.916214,
  "metadata": {
    "depot": "Kaunas",
    "route": "City delivery"
  }
}
isEntranceistruewhen the vehicle enters the geo-zone andfalsewhen it leaves.idempotencyKeyis unique per alert event - retried publishing of an alert event retains the sameidempotencyKeyvalue. Use it to skip duplicates.You can use the placeholders from the table above in the URL and in metadata values.
To see every webhook that Fliteca sent, and to resend failed ones, see Webhooks.